How to setup an automatic email response
There are times when you or an employee may be on leave and rather than disable or reroute mail for an email address you’d like any email sent to a specific inbox to respond with a message, informing a sender that the recipient is not currently available. This guide will show you how to create an automatic email response for an email address.
1. First, sign in to your cPanel. You can do this by going to www.yourdomain.com.au:2083 and then typing in the cPanel username and password, or you can login through the Host Geek client portal, click the large green “Active Hosting” button, then the orange “cPanel logo beneath the cPanel account you wish to access.
2. Once signed into your cPanel, locate the “Email” section, and click the “Autoresponders” icon.

3. On the following screen, you can then setup your autoresponder. The options include:
- The interval at which the autoresponses can be sent to a single email address.
- Setting the email address for which you would like the autoresponder to function
- Who the email will be from (such as the staff member’s name)
- The subject line of the automatic email response
- The body/message the email will contain
- When the autoresponder will become active
- When the autoresponder will become inactive
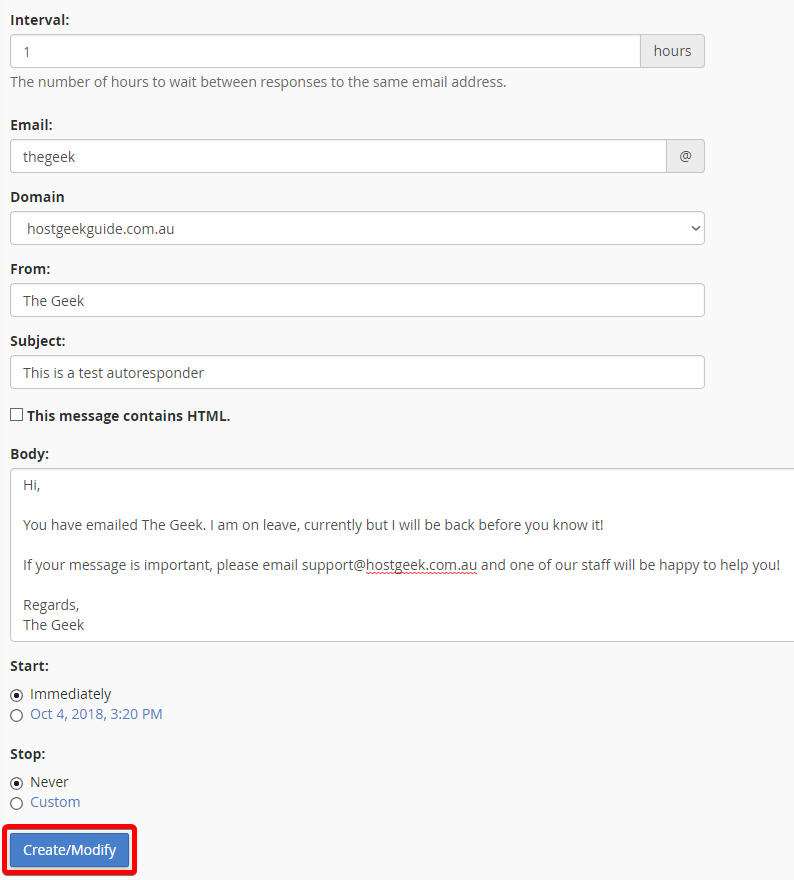
4. Once you are happy with your new autoresponder, click the “Create/Modify” button at the bottom of the page. The image above is an example we have prepared.
You have now created an autoresponder!
