How to create a subdomain
For larger sites or site with many varied pages or sections, you may decide that you would like to separate your content with subdomains. This can also come in handy when developing a new site while keeping the current site live.
In these cases, you can add a subdomain. To add a subdomain, you can follow these directions:
1. First, sign in to your cPanel. You can do this by going to www.yourdomain.com.au:2083 and then typing in the cPanel username and password, or you can login through the Host Geek client portal, click the large green “Active Hosting” button, then the orange “cPanel logo beneath the cPanel account you wish to access.
2. Once logged into you cPanel, locate the "Domains" section, then click the "Subdomains" icon.

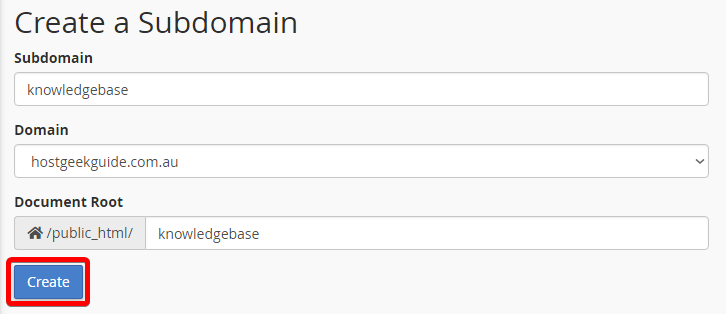
3. Once on the Subdomains page, you can now configure a new subdomain. In this example, we will configure the "Knowledgebase" subdomain. To do this, you will simply need to select the base domain in the second field (There will only be one option here unless you have configured addon domains in your cPanel) and then type your preferred subtomain in the first field. In the third field, you will select the directory that this subdomain will use. In this case, we will go with "knowledgebase". This will mean that when a user visits "knowledgebase.hostgeekguide.com.au" the contents of /public_html/knowledgebase/ will be loaded. Once you are happy with your new subdomain, click the "Create" button.
That's all there is to it! Your subdomain should now be active!
