If you are unable to configure the Auto Discover DNS records for your primary domain name, then you are able to connect Outlook to the Hosted Exchange service manually. This process involves many more steps then with the auto discover records correctly configured, and for this reason we highly recommend configuring auto discover for your domain.
If you have an existing email account, we recommend that you create a new profile in Outlook for the Hosted Exchange service, which allows you to go back to the old email in case you need to re-export anything.
- Open the Mail icon from control panel
- Click add a new profile. Enter a name and click OK
- The wizard should automatically launch to create a new email account. Select ‘Manual setup or additional server types’ and click Next

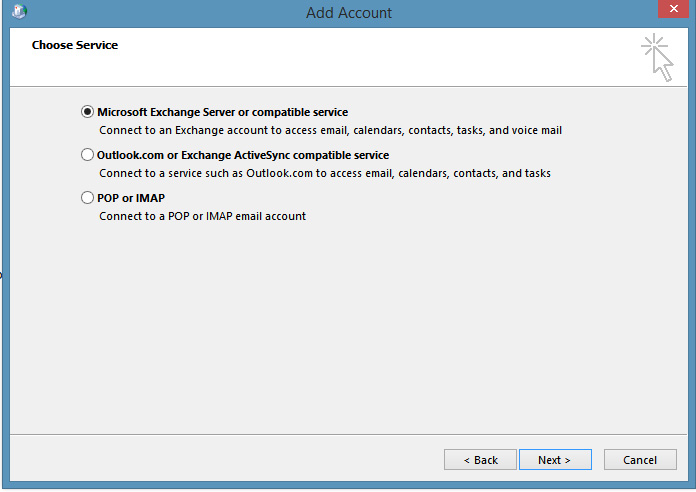
- Select ‘Microsoft Exchange Server or compatible service’ and click next
- In the Server field, enter: ex-cas01.my-hosted.com
Note: This setting may change over time. If you are unable to connect using this server name, call HostGeek support to confirm the current server name for your service
In the Username field, enter your email address
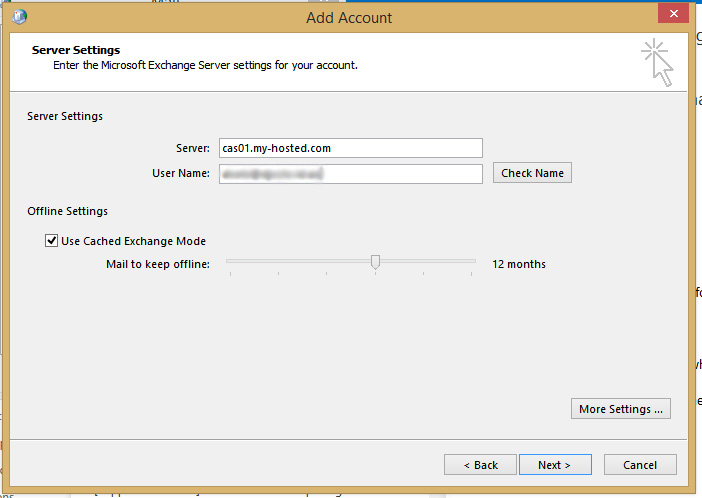
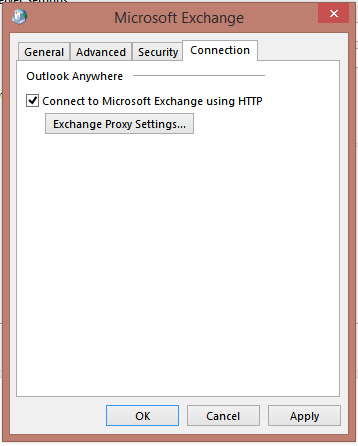
- Click the ‘More Settings’ button, and navigate to the Connection tab. Tick the option to ‘Connect to Microsoft Exchange using HTTP’ then click the Exchange Proxy Settings… button
- Under Use this URL to connect to my proxy server for Exchange enter:
owa.my-hosted.com
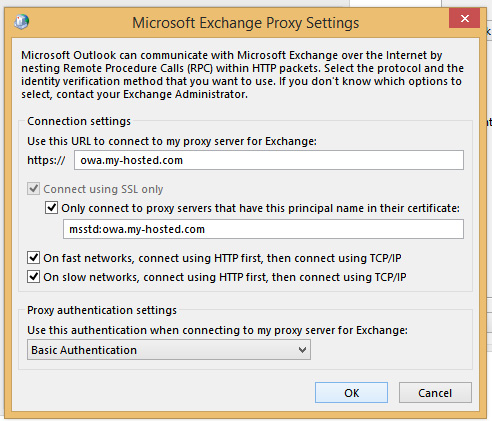
- Tick the option for Only connect to proxy servers that have this principle name in their certificate and enter: msstd:owa.my-hosted.com
- Ensure the tick boxes for On fast networks…and On slow networks… are ticked
- Set the Proxy Authentication Settings to Basic Authentication from the dropdown.
- Click Ok, then OK
- Click Next. You will be asked to enter your username and password. Remember that your username will be your email address, and your password will have been provided when your mailbox was configured
- When finished, in the Mail dialogue box set the option to ‘Always use this profile’ and select the newly created profile in the dropdown menu.
